

Begin by accessing the Front Desk Module by selecting the "Modules" icon and utilizing the drop down menu to select "Front Desk".

Check - ins can occur for conference participants and conference groups as a whole.
Participant Check - In
You would incur a participant check - in for a single participant. This is done at the participant level as explained here.
To begin, start by asking the conference participant for their name. Utilize the search field on the home page of the "Front Desk" module to begin searching the name of your conference participant.

Select your participant.
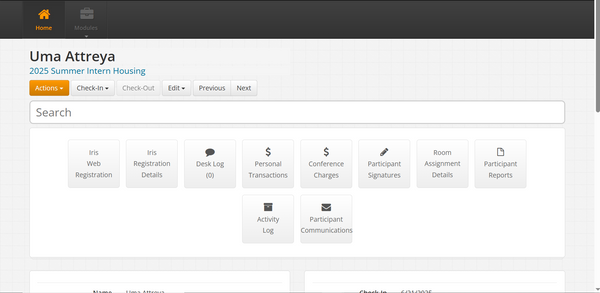
The following interface should appear after selection. This is deemed the profile page for the following conference participant. This profiles exists at the participant level of information. Notice the association to the conference "2025 Summer Intern Housing" underneath the name of the participant [highlighted in blue].
From here select the > Check - In < drop down menu.

Select "Basic Check - In".

The > Check-In < dropdown box will gray out to let you as the user know that the participant is now checked-in.
> If you check - in a resident before their assigned check - in date, you will be prompted the following pop-up window. The following message acts a reminder.

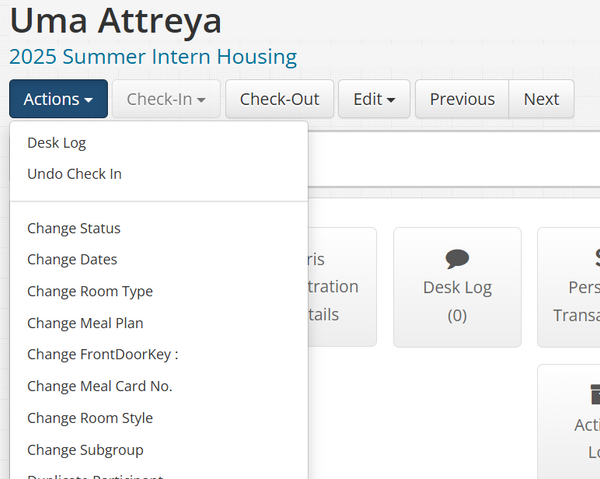
> If you accidentally check-in a conference participant for whom you are not checking-in, you may undo the check-in by selecting the "Actions" drop down and selecting "Undo Check In". [Note: Please refresh the page if the "Undo Check In" option does not appear].

For additional information throughout the check-in process, scroll down the page to view fine details such as Check-In date, Check-Out date, the participant's Name, Gender, Email, Telephone etc.

Information as shown above may serve the purpose of verifying participant information upon check-in. Information can also be used at a glance to provide insight into the participant's stay.
Conference Group Check-In
You would incur a conference group check - in for a single participant. This is done at the "Events" level as explained here.
To begin, start by asking the onsite coordinator for the conference group's name looking to check-in. Utilize the search field on the home page of the "Front Desk" module to begin searching the name of your conference group. You may select the "Event's" filter to populate ONLY event's using your search.

Select your conference group.
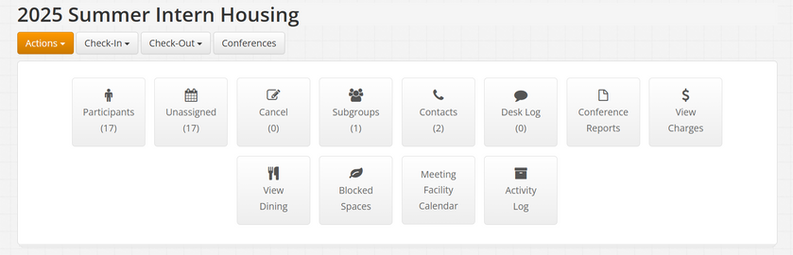
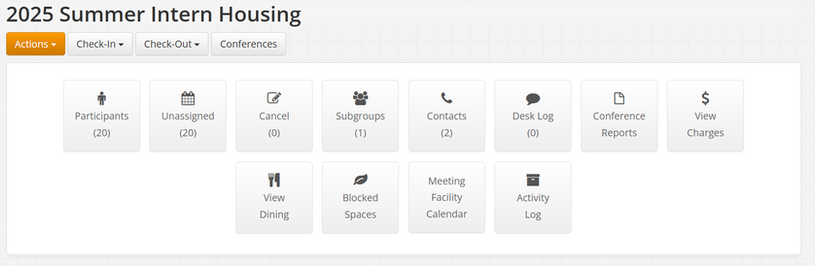
The following interface should appear after selection. This is deemed the profile page for the following conference group. This profiles exists at the "Events" level of information. From here select the > Check - In < drop down menu.

Select "Group Check In - Assigned" if the group checking in is checking in on the day on which the group is assigned to check - in. If the group is checking in on any other day select "Group Check In - Not Assigned".

> If you are checking-in a conference group on its assigned date, the "Checked In Date *" field will prompt a sole option of checking-in the day of. You may set the "Check In Time*" as the appropriate time of check-in.
> If you are checking-in a conference group for Not Assigned Participants [any other date besides the assigned conference group check-in date], select the "Checked In Date*" and select the appropriate check in date and time for "Check In Time*".

Select "Check In Now" to check in all the participants associated with the conference group.

Select "Confirm" to check in each participant. This will individually check in each participant in the conference group.
> If any of the participants are deemed by the onsite coordinator as no-shows, you will have to undo their check - in individually after having checked in the conference as a group check-in.
3. Check Out
Check - Outs can occur for conference participants and conference groups as a whole.
Once a conference participant has checked-in, what was once a grayed out "Check-Out" box will populate to be selectable. If this is not the case, reload the page, since the page will not update automatically.
Participant Check - Out

> If the "Check-Out" date is not the date on which you are checking out the conference participant, then you will receive the following pop up message. Disregard the message if the participant is allowed to check out on the un-intended date. Select "Okay" to fully check out the participant.

> If the participant is checking out on the intended date, the check out procedure should be instantaneous. No pop up window will display.
> If you accidentally check-out a conference participant for whom you are not checking-out, you may undo the check-out by selecting the "Actions" drop down and selecting "Undo Check Out". [Note: Please refresh the page if the "Undo Check Out" option does not appear].

Conference Group Check-Out

Once a conference group has checked-in you make check-out a group similarly to how they were checked-in.
Note:
> If you are checking-out a conference group on its assigned date, the "Checked Out Date *" field will prompt a sole option of checking-out the day of. You may set the "Check Out Time*" as the appropriate time of check-out.
> If you are checking-in a conference group for Not Assigned Participants [any other date besides the assigned conference group check-out date], select the "Checked Out Date*" and select the appropriate check out date and time for "Check Out Time*".
Recorded Information
Iris saves the date and time of which the check-in/out occurs. This recording feature is updated promptly after refreshing the page on which the check-in/out was made [conference profile or resident profile]. You can find this information right below the profile widgets.

4. Desk Log
You may find desk logs on all of the following levels discussed here. However, we are only creating and submitting desk logs at the conference level. This means that desk log entries should only be submitted on the conference group profile.
Submitting A Desk Log Entry
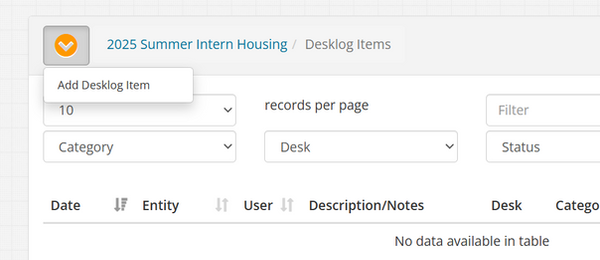
You may select to add a desk log from either two ways:

Or:
For any conference participant specific desk log entry, submit the desk log entry to the participant's associated conference group profile.
After selecting to "Add Desklog Item", a pop up window with a plethora or fields will appear. Fill each field appropriately.
Desk - Signifies the HI Desk location for which the desk log item belongs to, i.e. if the desk log is regarding a participant for a conference group that is staying in 8th, select "Eighth College - TDLLN".
Options:
-
Eighth College TDLLN
-
Sixth College NTPLLN
-
Revelle Desk
Category - Signifies the nature of the desk log entry. Please ensure that the nature of the desk long entry is accurate as certain desk log entries will be used for charging purposes during the billing cycle of the conference group.
Options:
-
Courtesy Key Use
-
General
-
Guest Comments
-
Lost & Found
-
Mail/Incoming Packages
-
Missing/Replacement Keys
-
Missing/Replacement Meal Cards
-
Payments
-
Purchases (Linens/Towels/Triton Cash Card)
-
Room Change Request
-
Void/No Sale
Note - Designated field for the desk log entry itself. It is imperative to be as specific as possible when submitting a desk log entry. Include the conference participant's name in the desk log entry, along with descriptive information regarding the situation and any follow up phone numbers, emails etc.
i.e. -
Conference guest "Shayla Williams" came to the front desk and requested for a room change due to personal disagreements with a corresponding conference guest. Followed up with Julio and it was agreed to switch the conference guest to a blocked off space. Room was changed from CT - 0210 -4 to TY - 0623 - 4. Updated the physical housing list to reflect changes made. A good call back phone number for guest Shayla Williams is 123-456-7890. - Max Dale @ 8:48AM.
Though Iris will time stamp and sign the desk log for you as you will see later on, it is important to do so in the desk log entry as well, in the case you are using another colleague's Iris account.
Completed - Signifies the status of the desk log entry.
No Status = Default Options
Complete = Desk log has been followed through. Desk log entry is checked off.
Not Complete = Desk log requires a follow up. Requires to be checked off.
-Note- You will receive a pop up notification/alert if you attempt to check out a conference group with a pending desk log entry that has not been completed which is why it is extremely important to follow up on desk log entries.

You may find an example Desk Log entry below.
To make edits or delete an existing desk log entry select the far right button with the three buttons to the end.
To mark a desk log entry complete, mark the Completed button box under the "Completed" column.
Utilize the information at your disposal in the following view for your reference.

5. Participants
To view the participant's associated with a conference group, search the conference group and select the conference group's profile.
Select the "Participant's" module to view a compiled list of all the participants associated with the conference group.
6. Contacts
To view assigned contacts with a conference group, search the conference group and select the conference group's profile.
2. Check In
1. Accessing